
DIY Playground Pt. 1
If you’re looking into a playground and want something different like I did then follow along on our custom playhouse journey! I’ve been looking at playgrounds for months and months, but can’t believe how expensive they can be and also just kind of…meh. If you’re new here I think you’ll come to know pretty quick that I’m a dreamer and I love to dream up things that are different and sometimes magical! So dramatic I know…Let me show you what I mean and how I’m hoping to create a magical space for our kids that no one else will have in their yards!
Here’s what this side of our yard looks like! I’m pretty sure it can only get better from here…

First, what type of playground did we choose?
Well, I started out wanting just a single little playhouse that’s a few hundred dollars but you know whatever works to get some playtime so I can get some me time. My biggest dislike with a playhouse though is that I could picture it sitting in the grass getting all nasty from the sprinklers or covered in spider webs. I then knew that we’d need something a bit bigger since we just had kid #2. I landed on this playground on amazon for $900 which I thought would fit the bill. It has a playhouse higher up, a little platform to move around on, and stairs to climb up which we liked the idea of so younger kids could climb up too. Everyone in the reviews added a slide so that would go where the ladder is.

However, as I read reviews and looked more into it most people said their older kids about 6+ grew out of it. That’s only 3 years away for Cove and we need something that’s going to last much longer!
We have lots of family and friends stop and stay with us as they pass through town so I knew we’d need something more long-term.
On a whim I went and looked on etsy for “playground plans” just to see if anyone sold any and ding ding ding that’s where I found our design!

Here’s a rough design that I made in canva of the playground plans to see what it would look like in our yard. I purchased the plans for $14 off of Etsy and there are about 160 pages of detailed instructions! The first thing I did after purchasing the plans was I added up the total cost of all the materials to compare to the other playground we were looking at and they came out to the EXACT SAME PRICE, but this design is bigger and long-term. We even figured we could keep adding onto it if we want and make an even tall platform with a taller slide or something.
Did you know you can order a MASSIVE order of wood at Home Depot and within two hours they’ll have it ready and bring it out to your car?
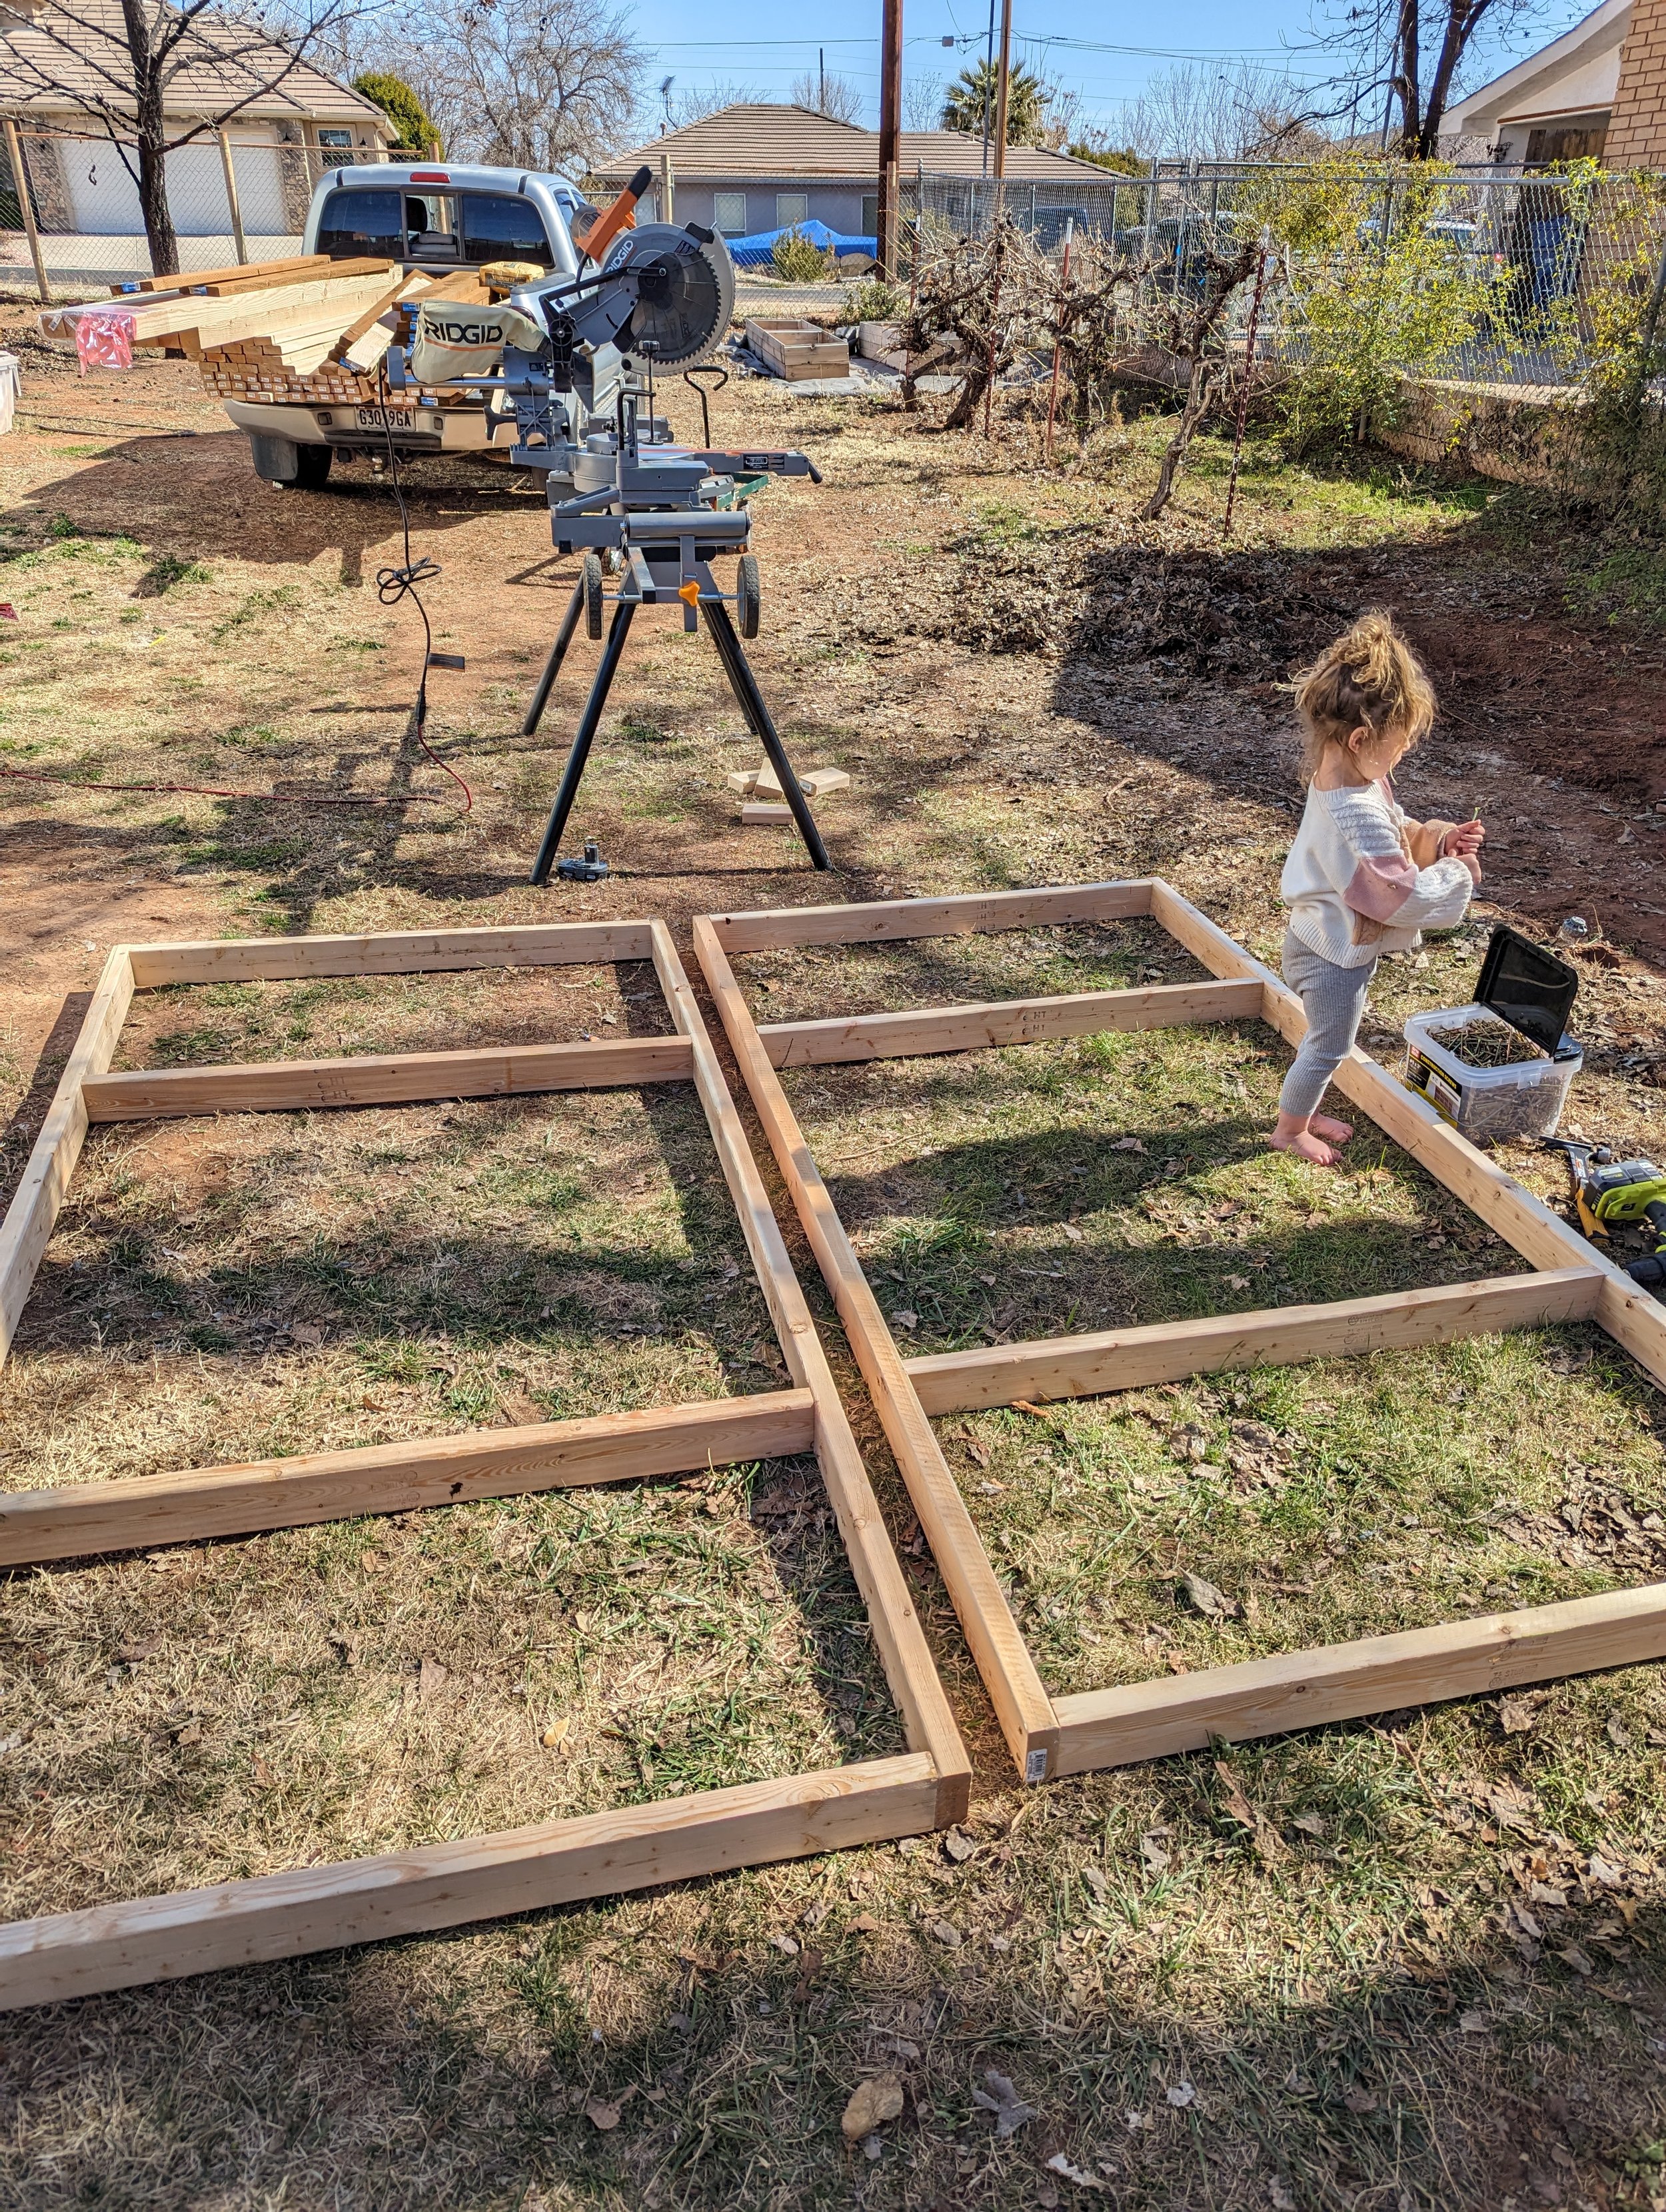
For us, that was a game changer so we would have to be hauling kids and wood endlessly around Home Depot haha We started by picking up our supplies and headed home to begin prepping our area. We had to move lots of tools, a massive pile of heavy stone, and then remove a couple of grape vines and t-posts. We learned you can remove posts out of the ground with a car jack *mind blown*!
Once the area was clear it was time to start building!
Tip: We wish we would’ve gone through and made all of the cuts and pre-cut ALL of the wood that way it would just be left to assemble and put together the puzzle pieces. When we were in a rush trying to use up all the light left at the end of the day we would make wrong cuts and waste some wood. Best to do it all at once with a clear head! haha
Supplies We Used:
Miter Saw- This saw was an investment but one we have never regretted with all of our projects!
Tape Measure- We LOVE this tape measure! Seems so silly but a nice tape measure makes a huge difference and saves time! We have had so many tape measures, in fact, we try to keep three or four upstairs and downstairs since we always seem to need them haha
Ryobi drill- I linked an amazing drill starter kit! We used two drills, one to make the holes, and the other to screw the screws! It allowed us to work together and Ryobi’s performance battery makes it even better!
Hammer- To me a hammer is a hammer haha This is the one we use!
Bucket- This is what we used to mix the cement before we changed the cement type that doesn’t require mixing beforehand
Cement- Just add water! We used two bags and I would maybe get three to be safe! It worked for us for all 8 posts!
Screws- The instructions said to get 50lbs worth of screws buuut we got the 25lb and didn’t even get close to finishing it!
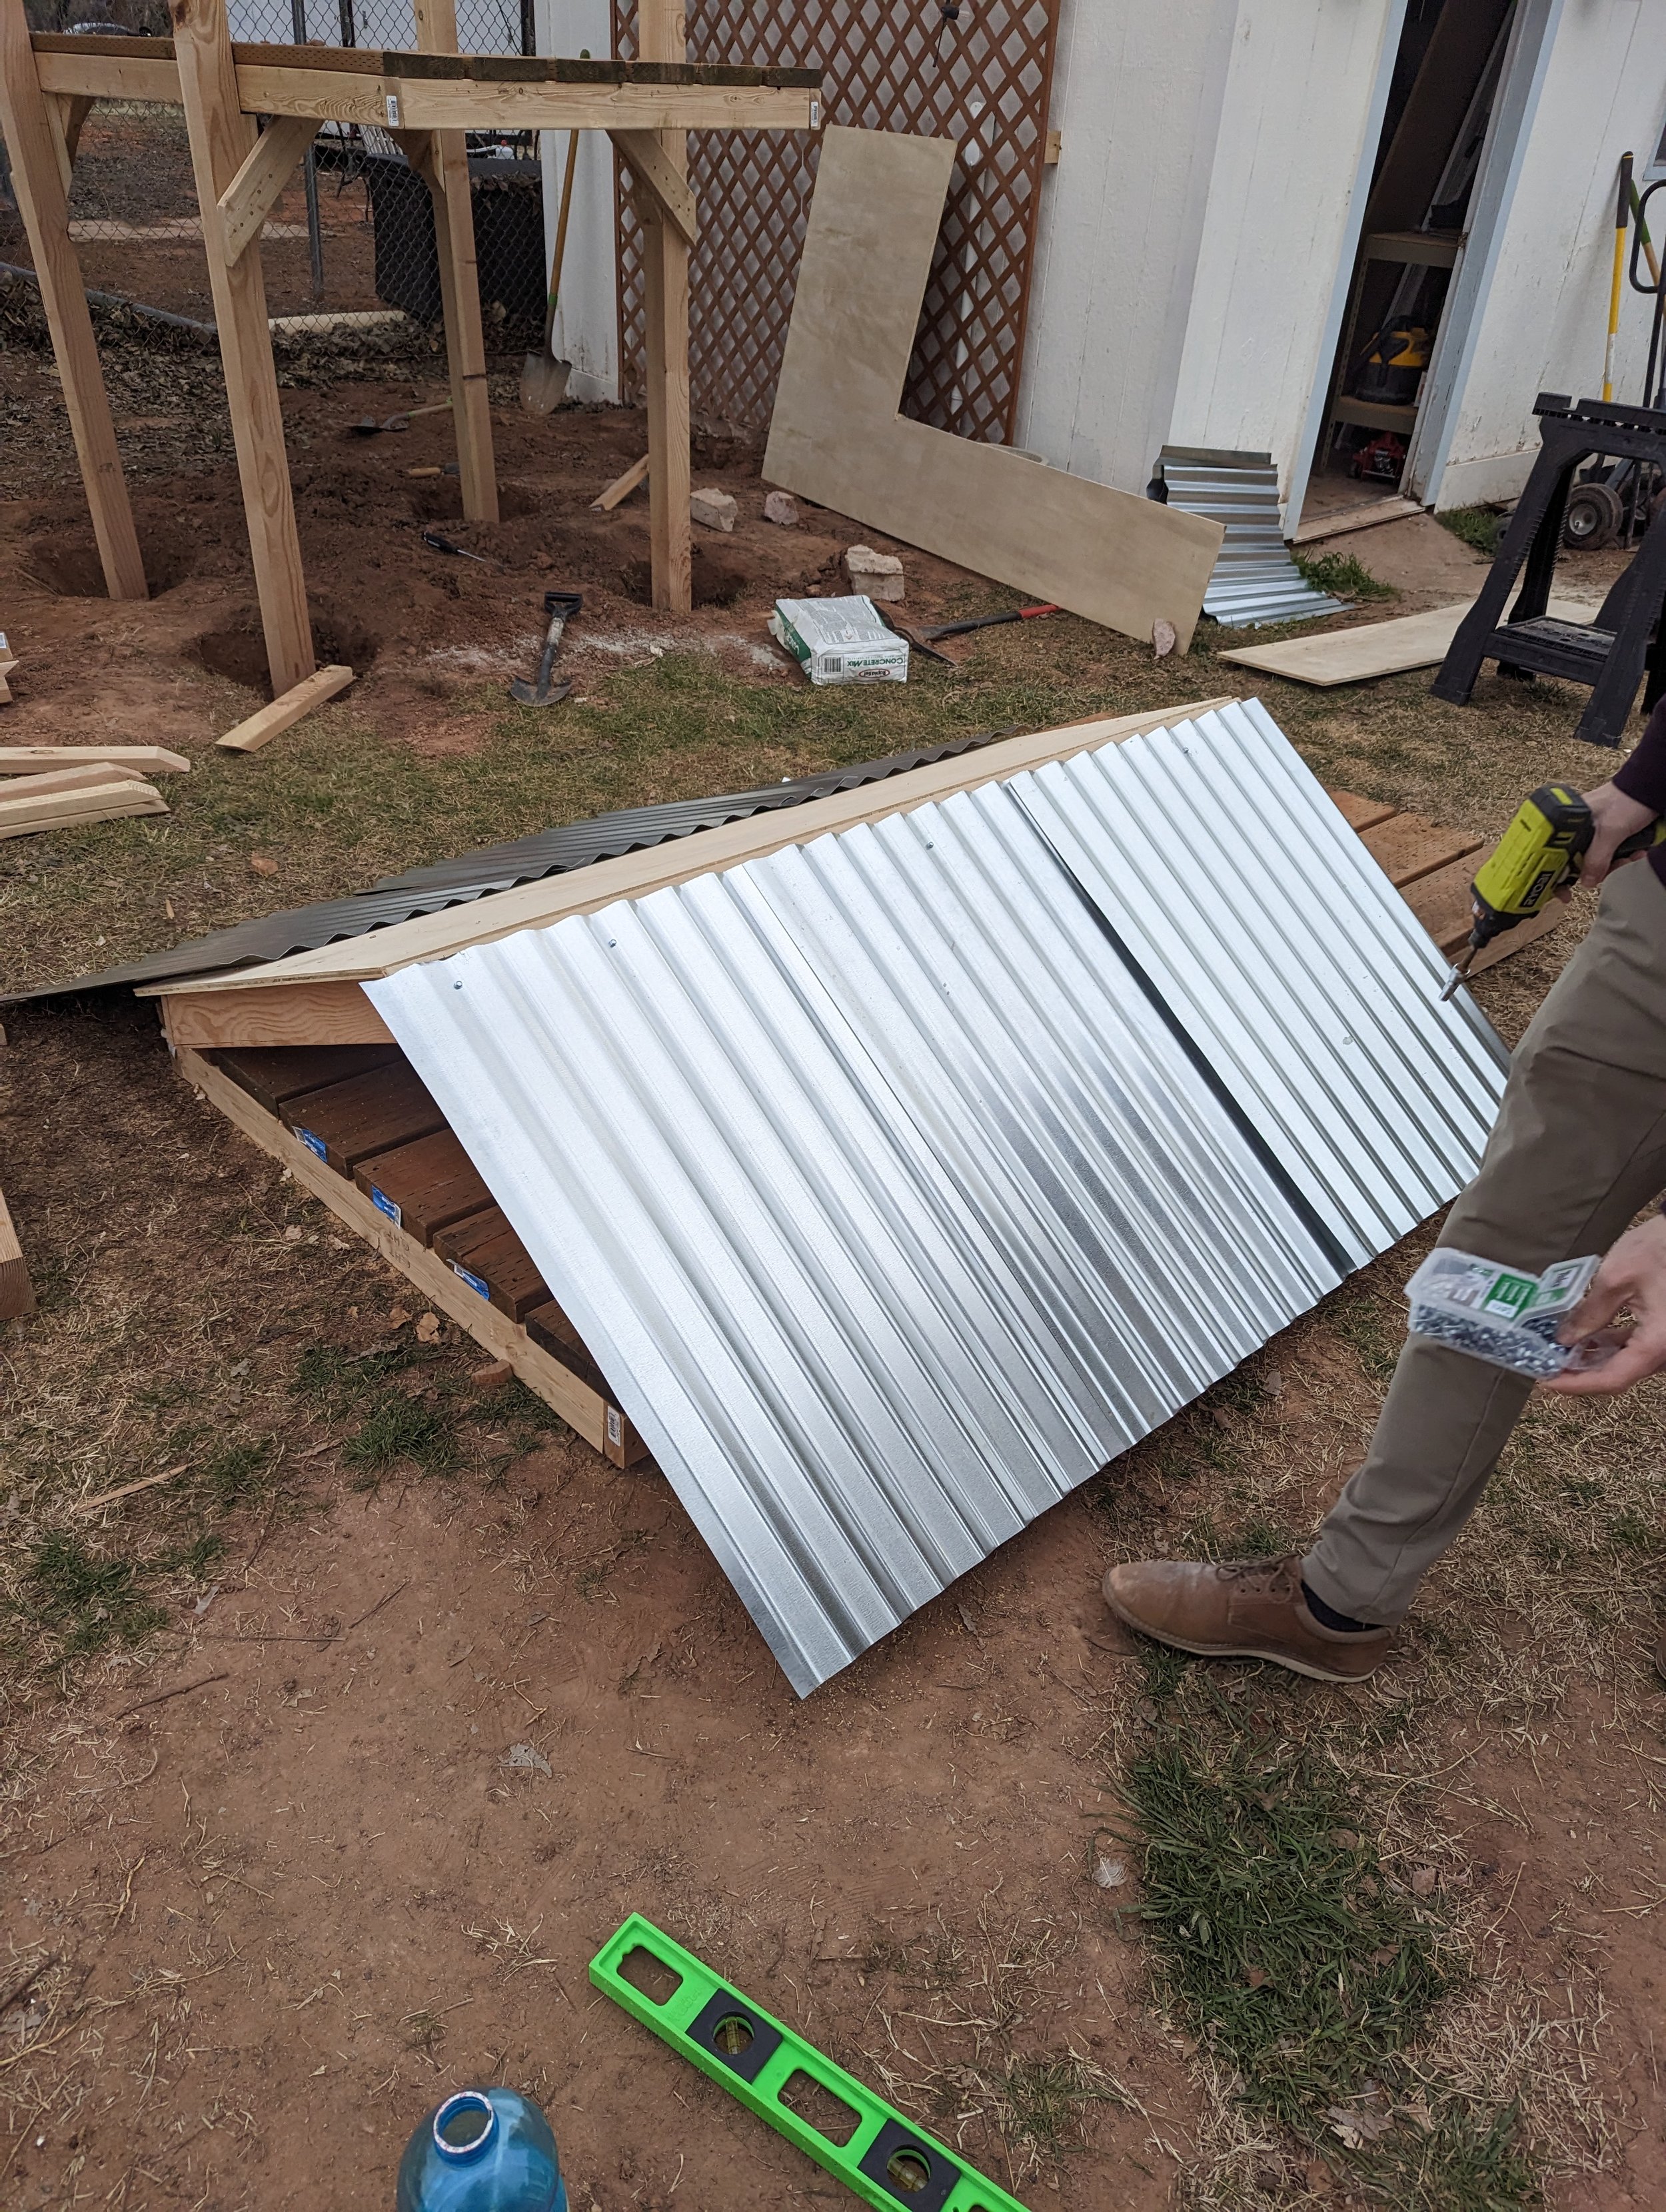
Grinder- We used like 4 different tools to try cutting the metal sheets and the grinder cut it like butter! (Of course that was the very last tool we tried and there wasn’t much left to cut haha)
Paintbrush- This is a good brush for stain! I found using the brush was easier than the roller to control the drips.
Stain- I chose this stain because I wanted some of the wood knots and imperfections to show. Semi-transparent lasts 6-8 years. I like the color the best when there are multiple coats.
The instructions call for making a platform and we just doubled all of the instructions so we could make two at once instead of going back later and doing it all over again.
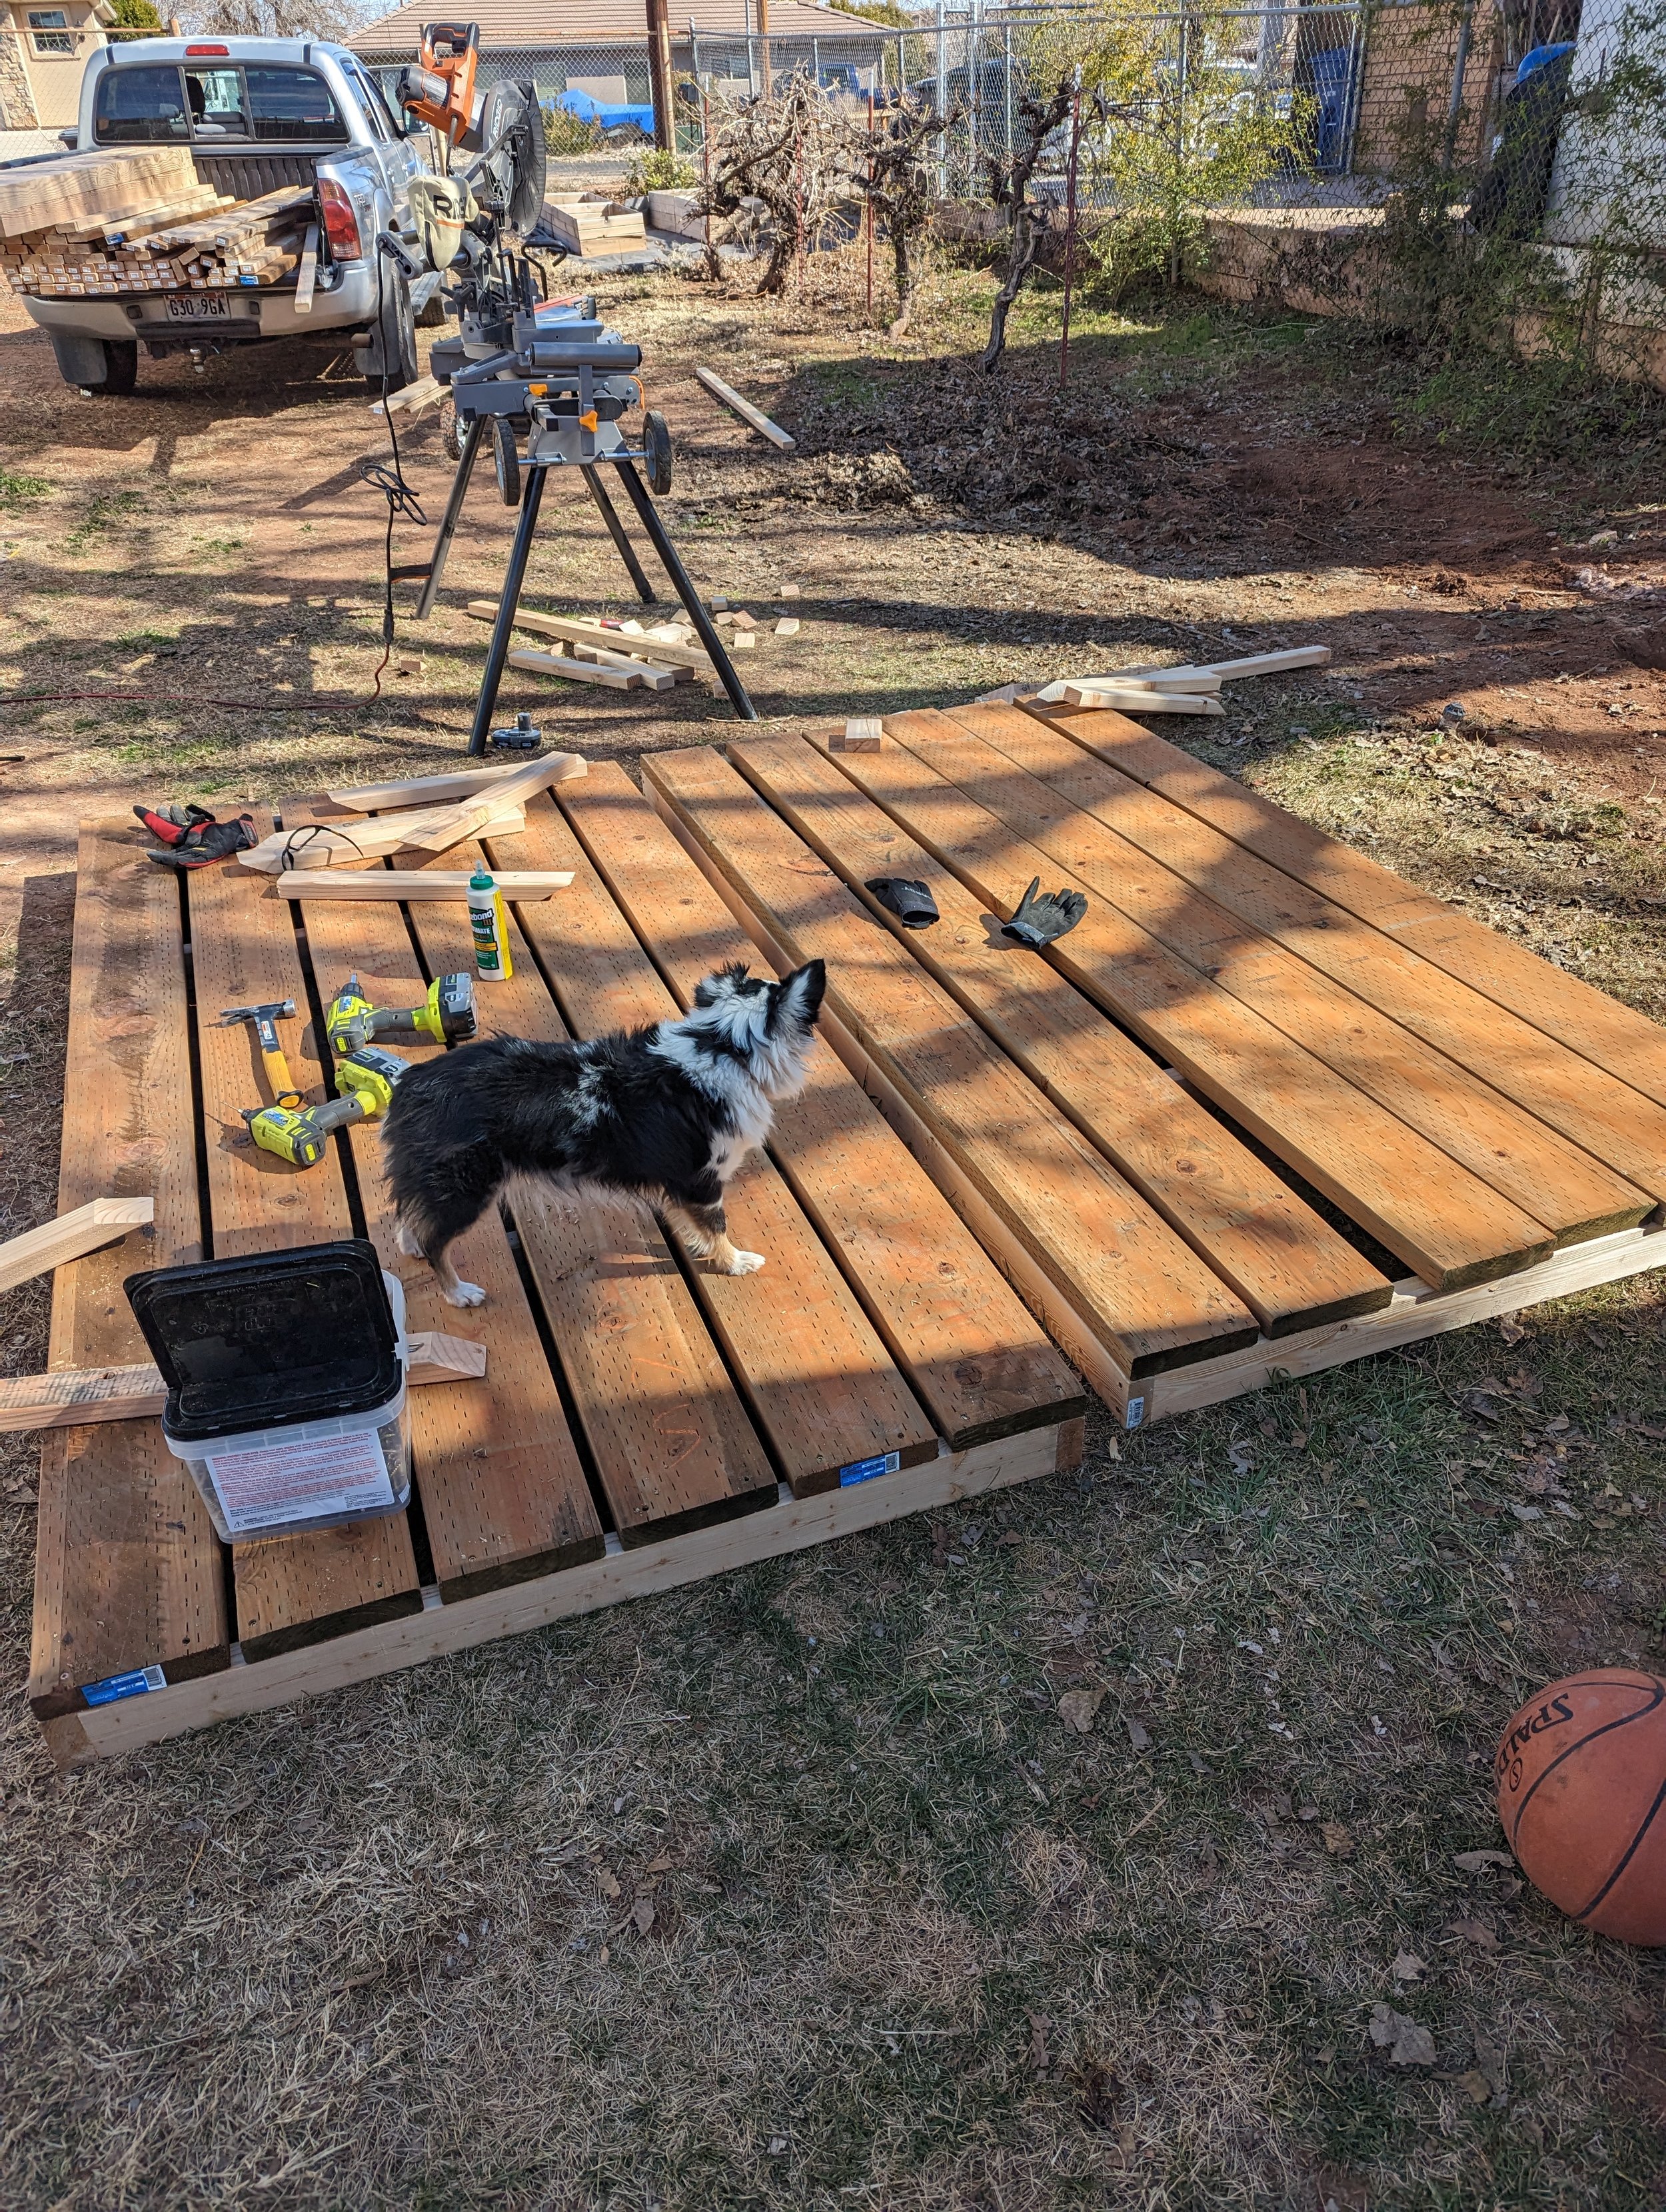
We predrilled holes and I twisted the end of the screws in them so Dallin would have a quicker time just screwing them into the platform.

This is the wood glue we used as much as we could in all of the places we could before screwing them into place.

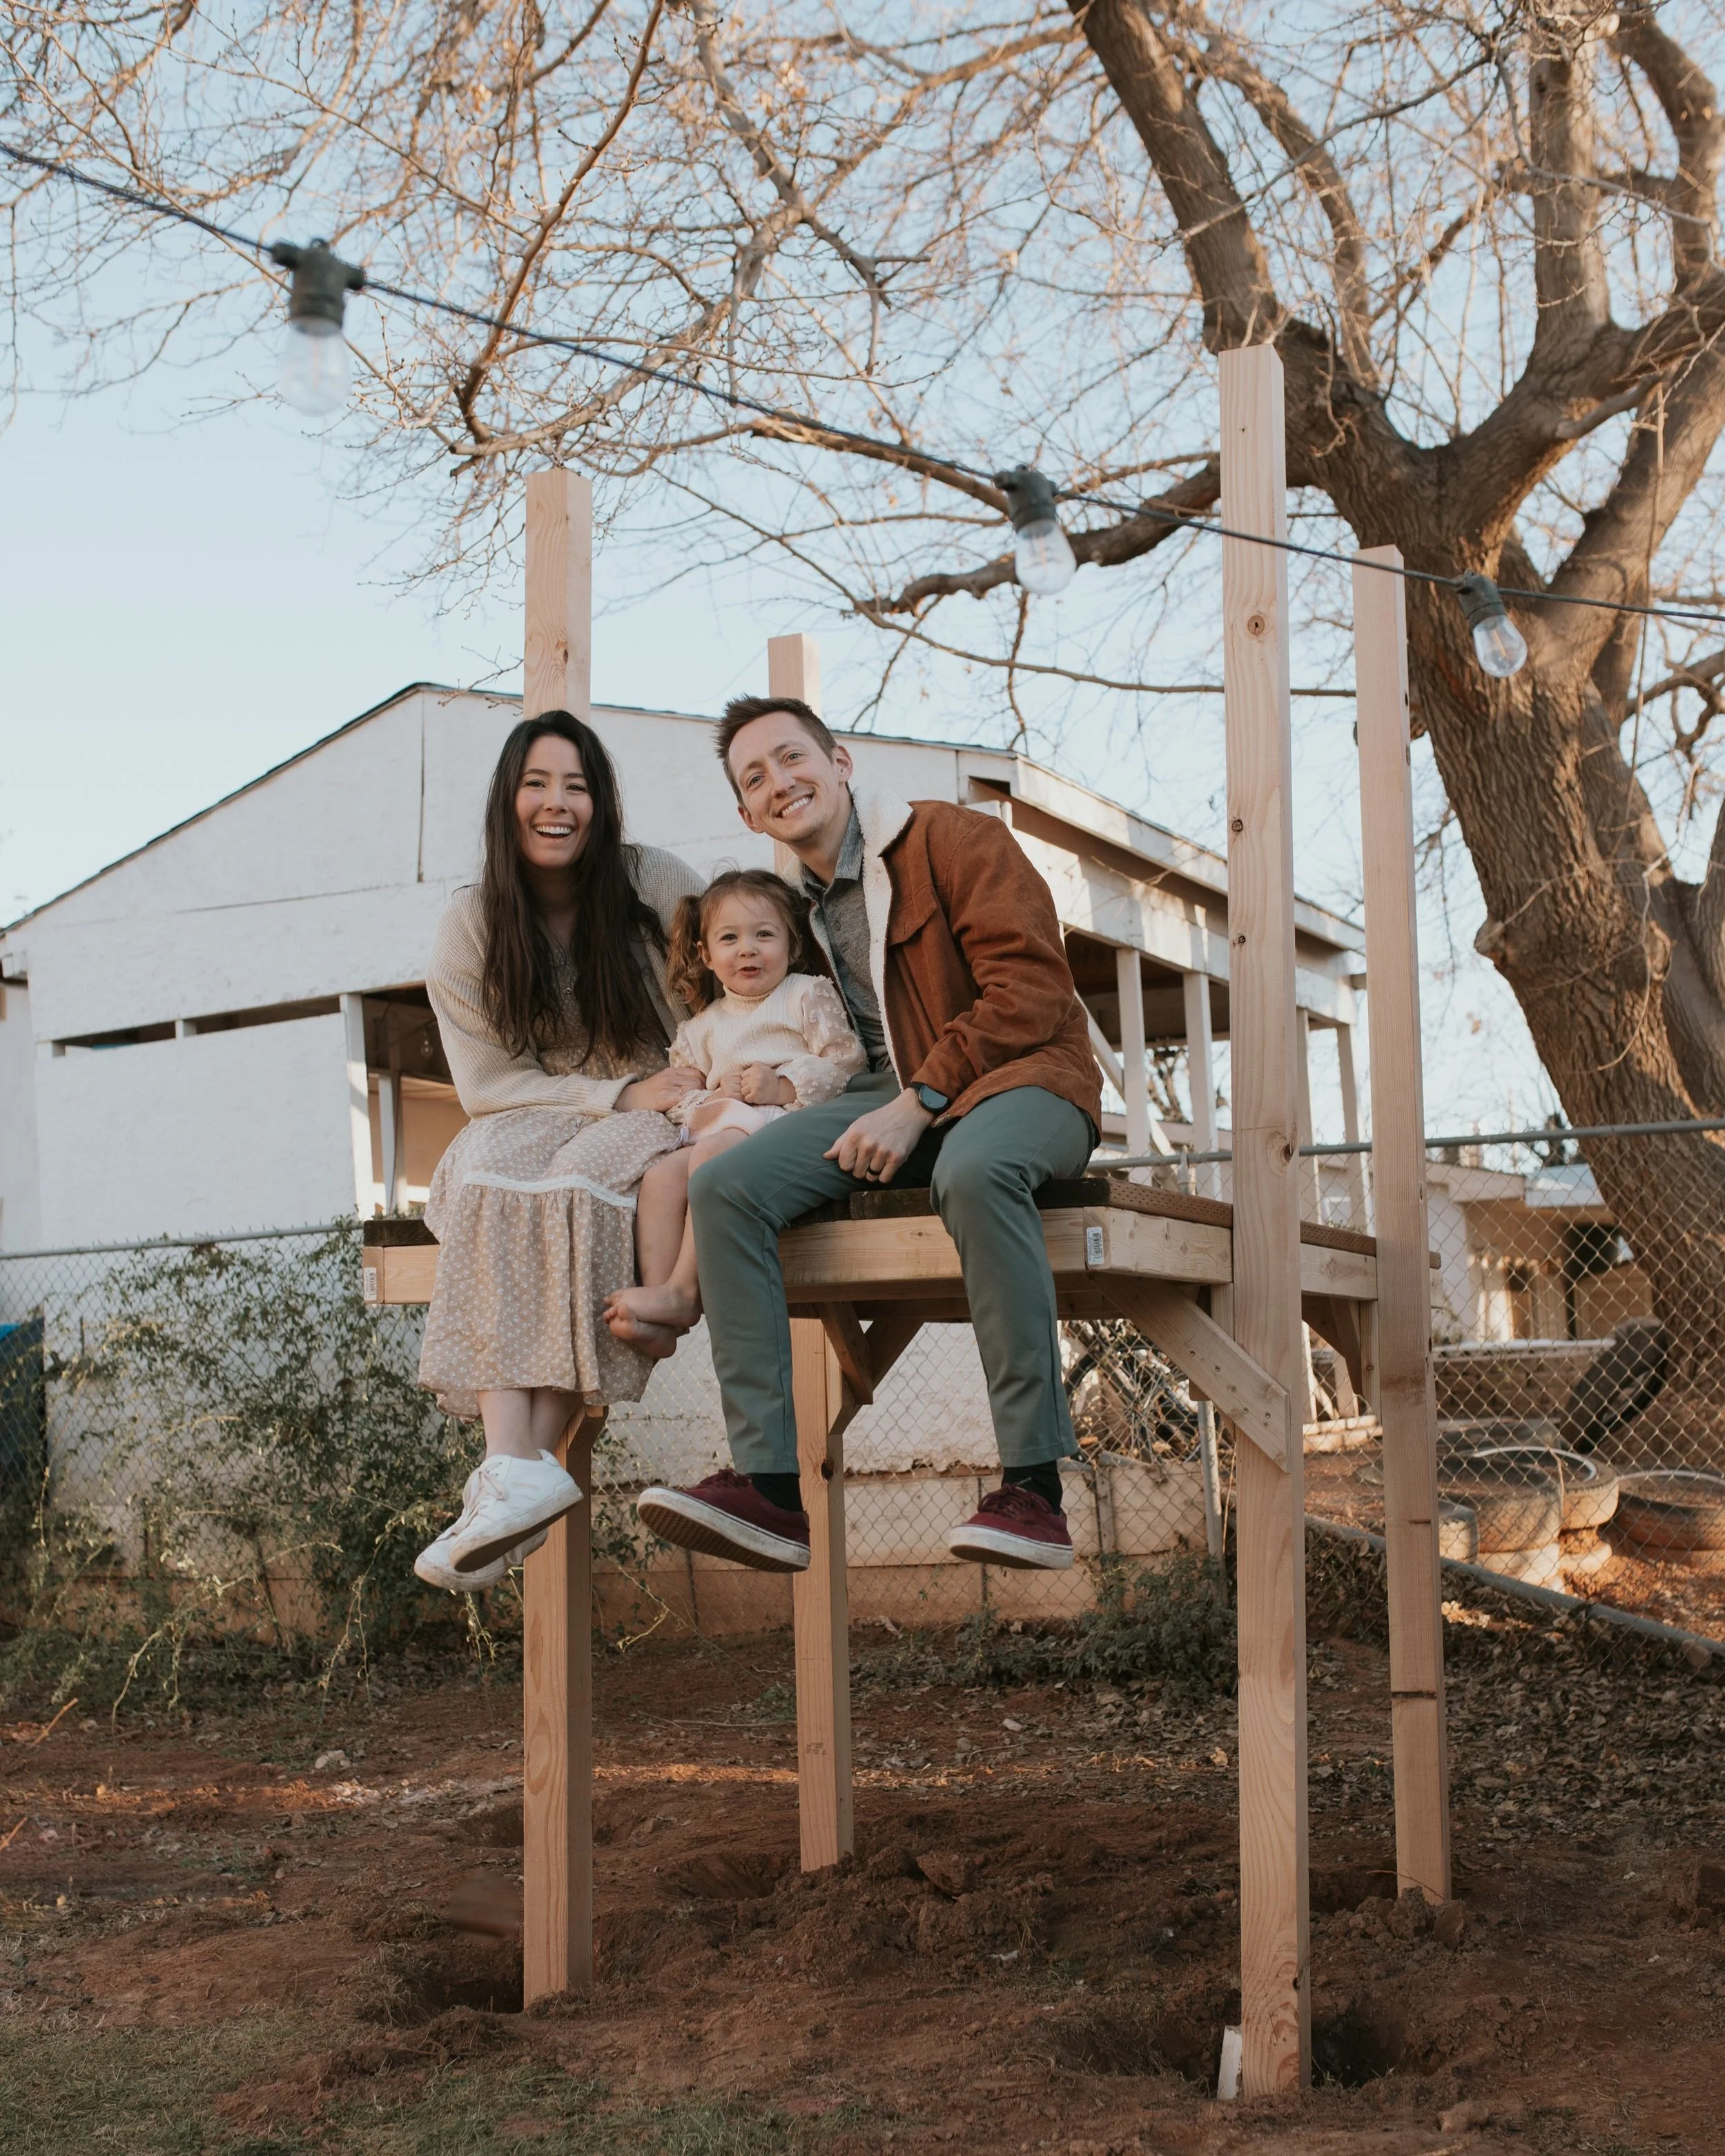
Now the first platform is starting to take place and we just need to add the other leg and tilt up! This was SUPER heavy to move and I wasn’t a ton of help so the more hands the better!

Cove’s face is the absolute best haha We love that we are building this as a family and have lots of fun things planned and can keep adding to it!
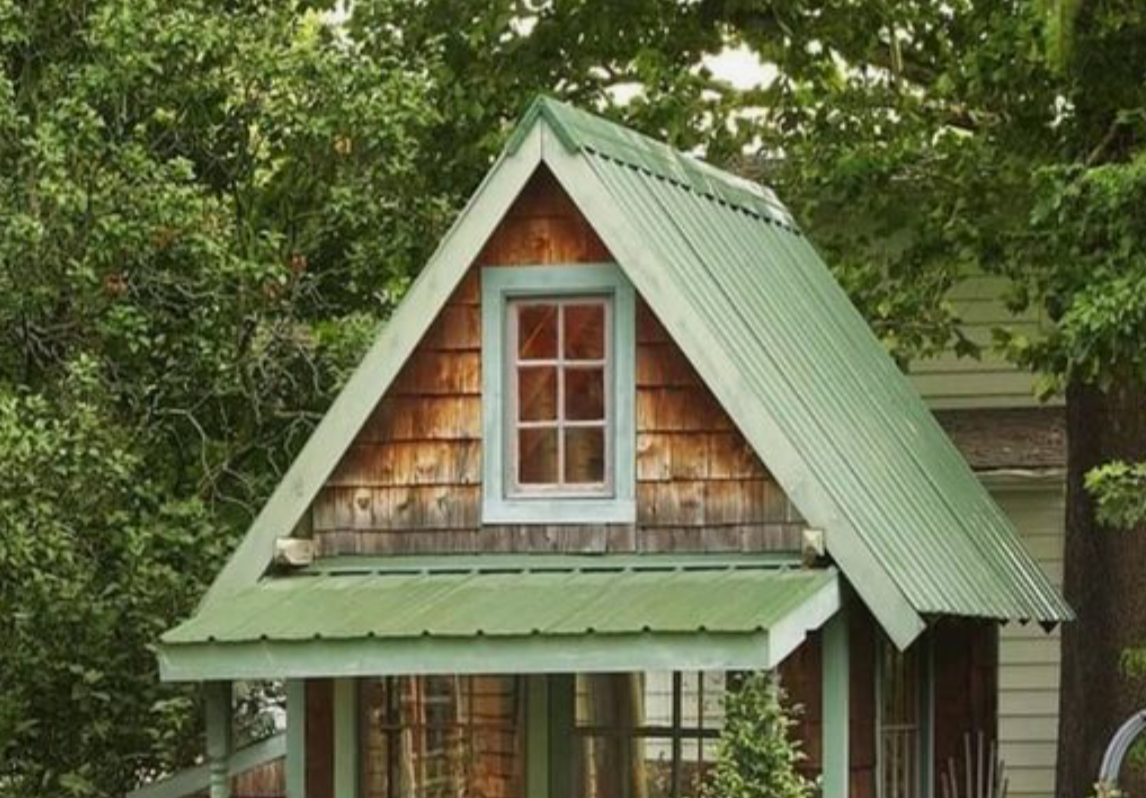
The instructions said to do shingles but I wanted to do a metal roof and here’s the inspo pic I saw that gave me the idea! I even love the green color so maybe we’ll go with that!
I made this little mood board of what details I’d love to add to the playhouse! Can you picture toadstool table and stools, lanterns and fairy lights, wooden branch archway? I’m so excited to let creativity take the reins on a fun project like this!

