

Faux Stone Fireplace
*The Following Post May Contain Affiliate Links Which I Earn A Small Commission From. Thank You!*

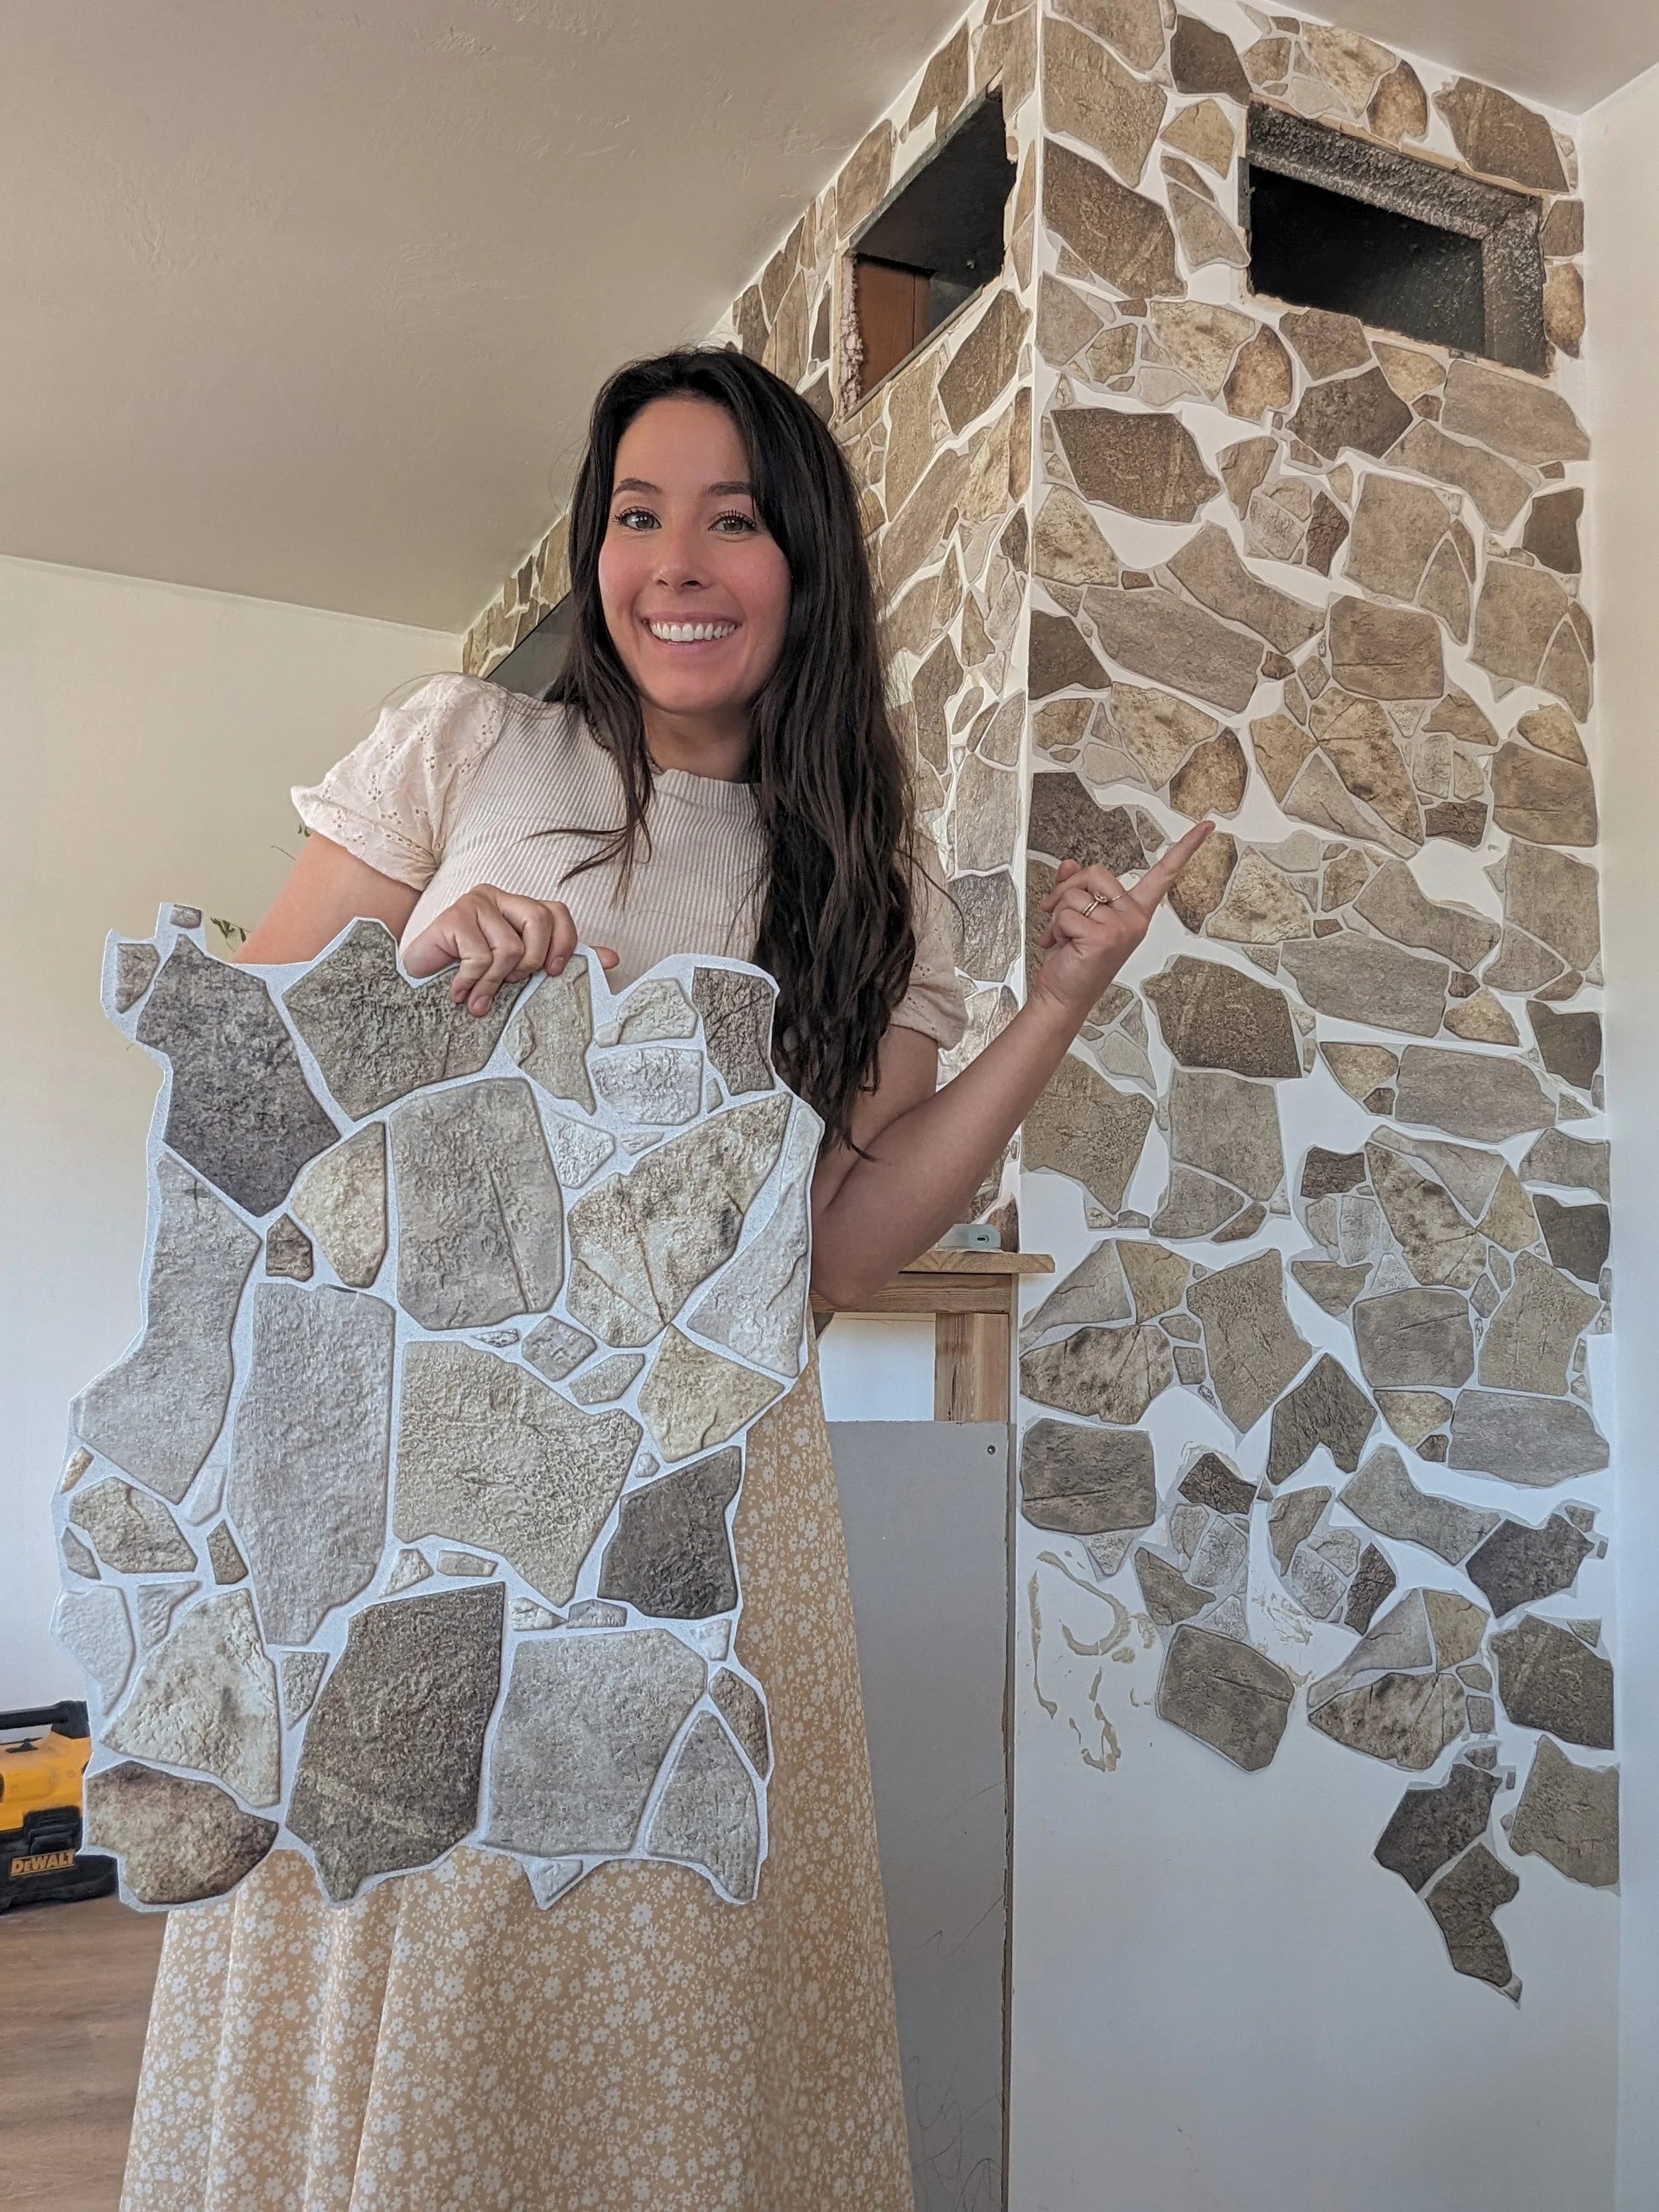
I wanted to transform this fireplace/ tv wall into something more permanent and bold for our upstairs. We have spent most of our time on the downstairs since it was built in the 1880’s and needed to become functional whereas the upstairs was added on in the 70’s and is mostly just outdated.
I got this electric fireplace for free from a friend and have liked it for this space! Now I want to fill up this whole wall by tieing in the real stone we have in our kitchen and doing faux stone up here.

GATHERING INSPO
I try to make mood boards before my projects to gather my inspo and also to help Dallin see my vision since it’s often difficult to convey what’s in my head haha
This is my inspo for the wood of the mantle, but a bit lighter. I want to do delft tiles in the inside of the fireplace to add color and character. Lastly, I want the stone to be mostly filled in to give a smoother stone texture and for it to be colored warm white.

WHAT WE USED
Supplies:
1 1/2 sheets of 1/2” drywall
Eight 2x4’s
Faux Stone (I used two sets or 20 sheets)
Joint Compound
Liquid Nails (I used about 4 tubes)
Good quality wood for mantle (My mantle is 8ft long and 16” deep)
Magnets for front of the mantle (These are so much cheaper than they were at Costco! We needed something really flat)
Tools I already had:
Nail gun
Miter saw
Tape measure
Pencil
Nails
Caulk Gun
Tools for roughing up wood:
Drywall knife
Sandpaper
Hammer
Crowbar
Wood Chisel
Big rock
LET’S GET STARTED!
I try to use the pick-up app from Hope Depot to make getting supplies easier with kids! This piece of drywall fit as snug as a bug in a rug!

I cleared everything out of the way and started to get the framed measured out.

My wall is just under 8ft wide and I made the mantle 16” deep and “ high.

I began making my frame and making all the cuts before attaching anything together.

Getting the frame to be level was tricky because our floor slants (got to love old houses, right?) and required building the left side higher than the right.

STARTING THE STONE WALL
Next, I began on the stone so I could make sure that the stone went all the way behind the wood of the mantle and would look more natural than if I tried to work with the mantle already in place.
I decided to cut the stone sheets into pieces cutting in between the stones so I could get thicker grout lines. I chose to do this because my real stone in our kitchen is very large and has lots of space in-between the stone.

Attaching the stone
I put liquid nails on the back of the stone piece and pressed it to the wall. It’s basically like a puzzle if you go this route but these sheets are designed to fit right into each other. I didn’t want it to look cookie cutter and I also had to navigate around these vents (so not ideal and ruins the illusion a bit but that problem can’t be fixed) so having them in pieces took a bit more time but was worth it!

These sheets come textured so it gives a good illusion of real stone and covering both walls didn’t take too long! I worked at night after the kids were asleep so it was only a few nights but would probably only take a couple hours.


GROUTING THE STONE
I mixed some “Alabaster” paint that I had on hand into the joint compound and found that using my hands to place the compound onto the stone worked the best. I fit it in the grooves and then smeared it around.
I used a large damp sponge to smooth it out and for me the more wet the sponge was the better it looked.

This is how it looks when it’s dry and the sponge was damp but not super wet. Very streaky and rough.

This is how it looks dry after the wet sponge! More smooth and soft.

THE MANTLE
One of the biggest design choices I made with our mantle is wanting the front to open….okay okay stay with me! We have such little storage that we thought it would be so amazing to keep all the techy stuff in our mantle like our Nintendo switch, computers, and remotes so after building the frame and adding the drywall we tried to wrap our brains around how to make it happen.
Just a heads up we’re pretty sure we know now why you don’t really see that anywhere because it wasn’t exactly easy, but that’s why we figured it out for you!
We grabbed some of the items we wanted to store in the mantle and held them up to figure out how “thick” the front of our mantle needed to appear so we could fit our items inside.

We cute the drywall so it would go right up to the bottom of the wood.

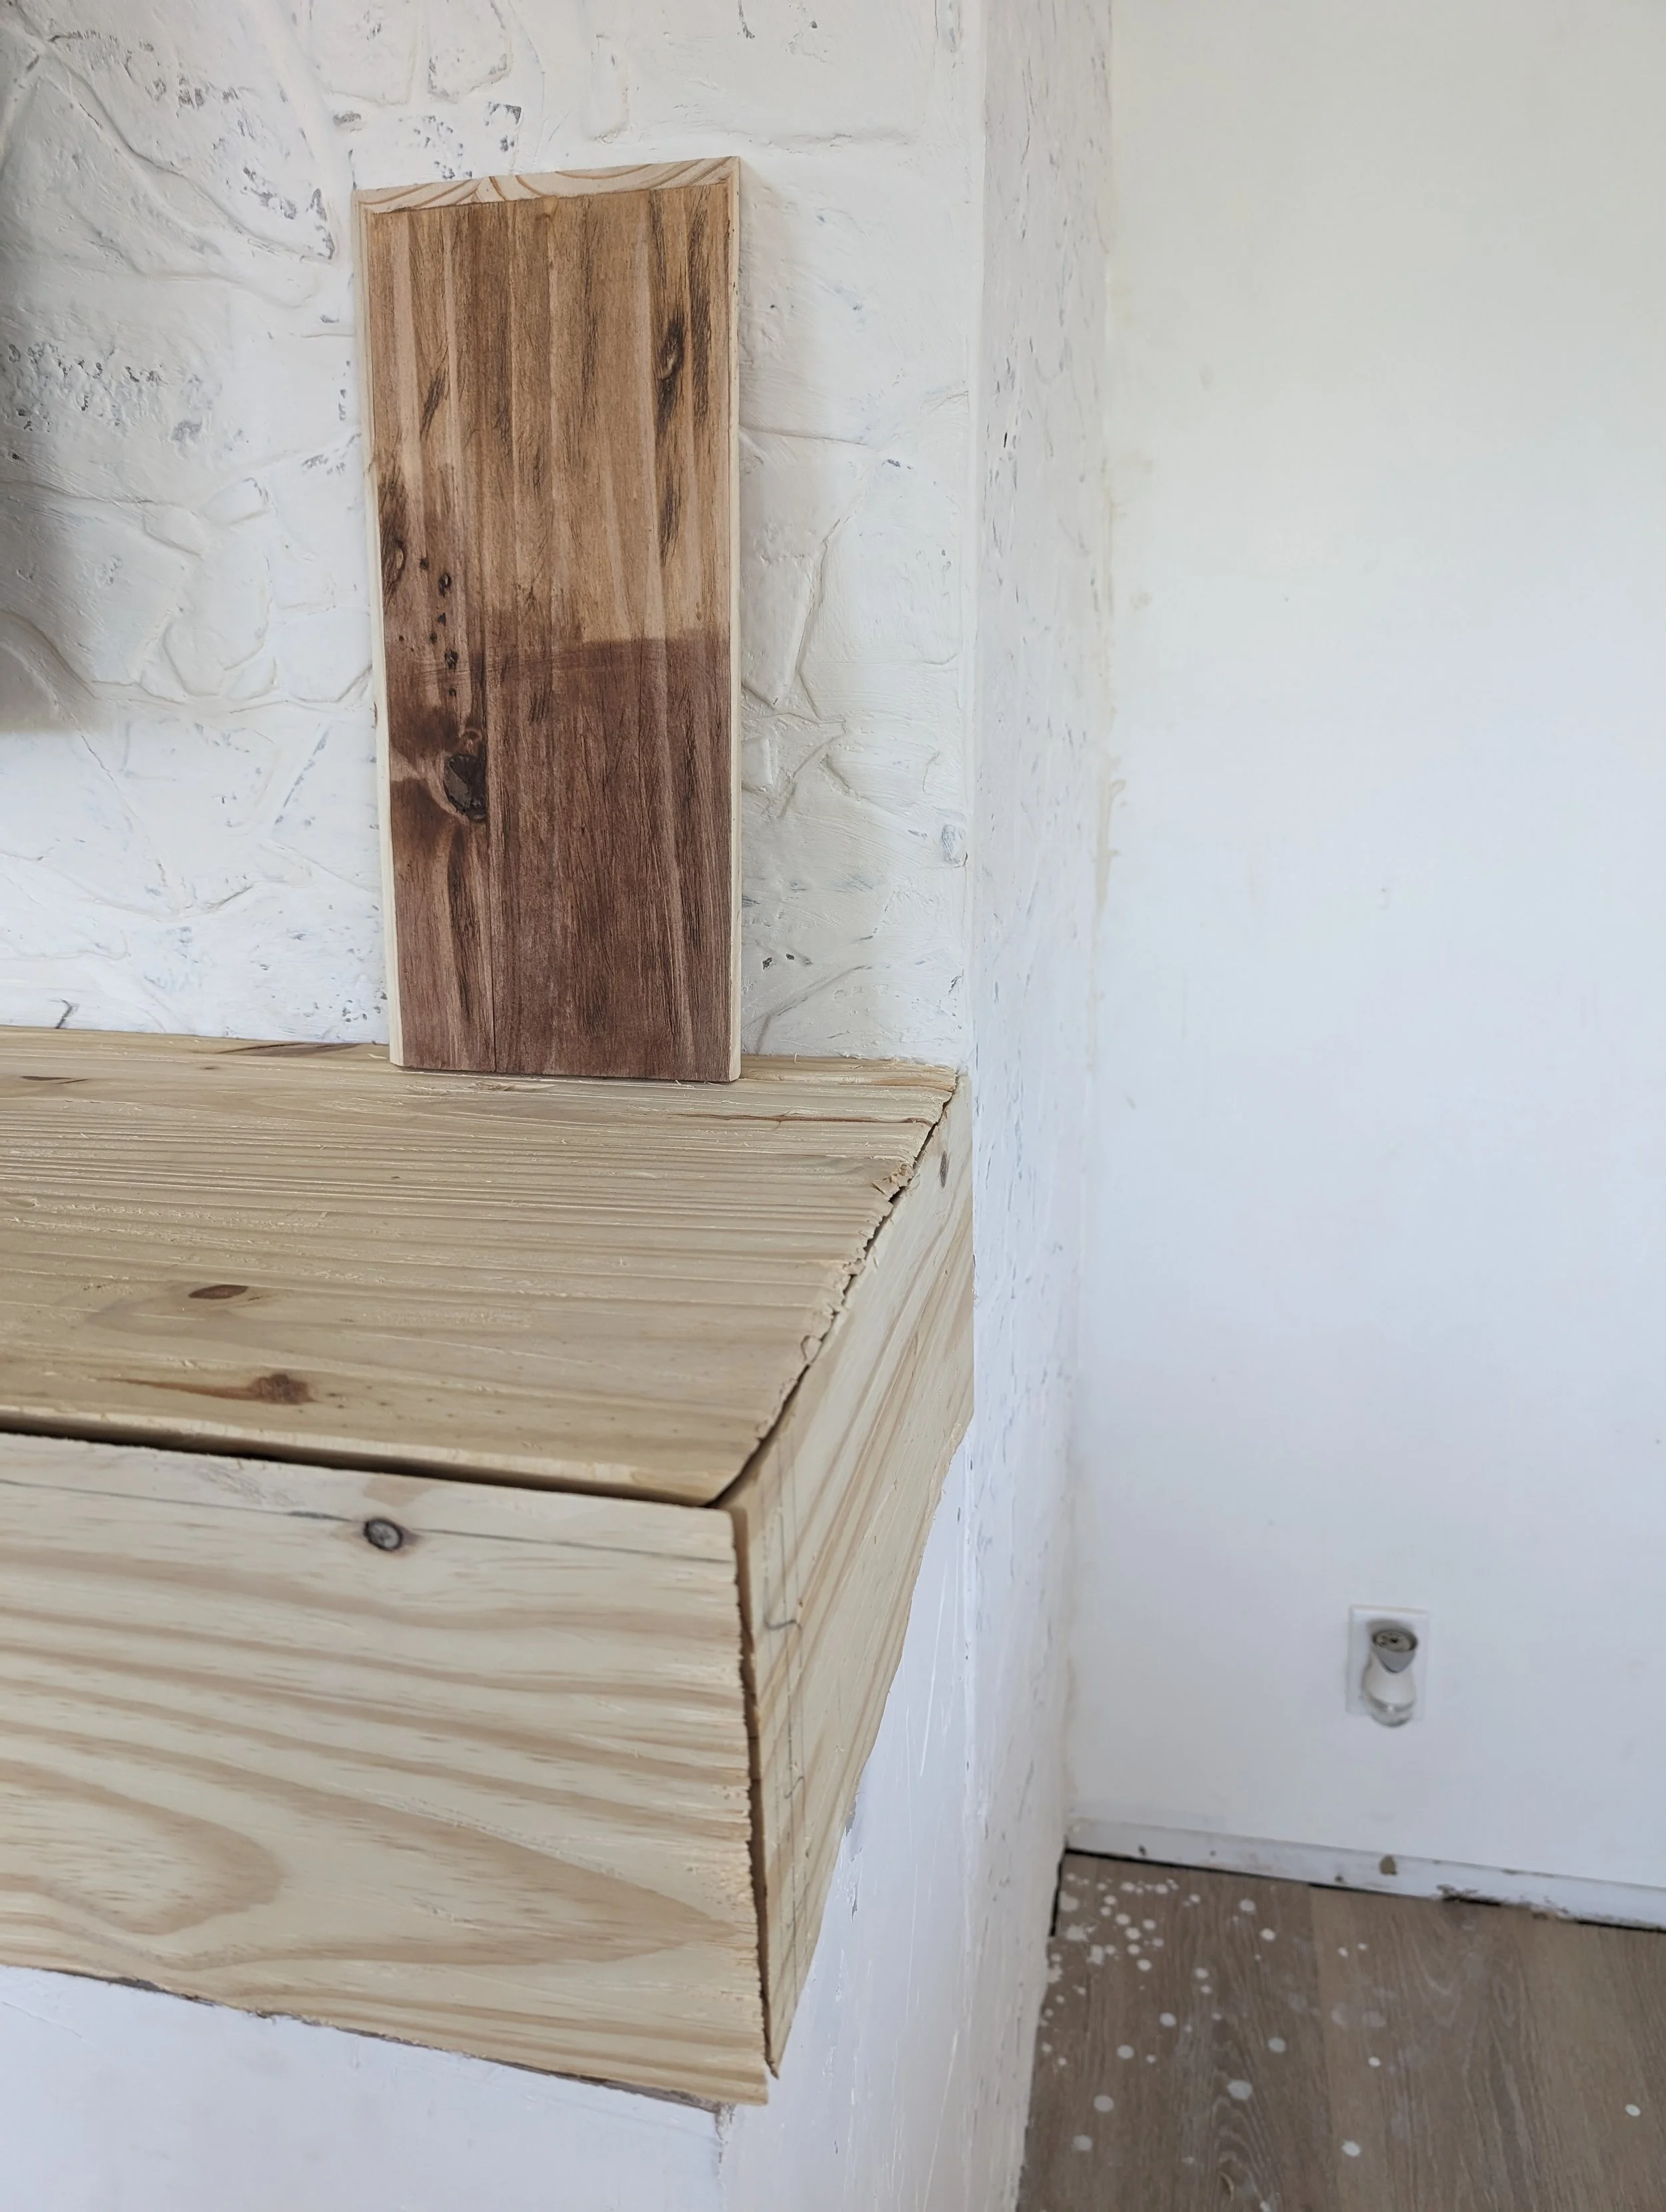
TRANSFORMING THE WOOD
I have a few pieces of 100 year old barnwood that I absolutely love the look of, but the wood wasn’t big enough for this project. I used it as my inspo for roughness and coloring.
I realized I needed to make the brand-new wood we just bought to look like it’s 100 years old and I gathered up some tools to make it easier!
DIY Barnwood
Using the wood chisel was my favorite! Taking off the sharp corners immediately made the wood look old and imperfect.

Next, to create the box-like look so that the mantle will appear to be all in one piece we cut the top piece edges at 45 degree angles.

We placed the top piece on to see how it fit. We didn’t cut the right (or wall side) at a 45 degree so that it would get as close to the wall as possible.

Getting the front piece to work was the hardest part of the whole project haha
We ordered 90 degree hinges that we thought were soft close but they weren’t so we had to return them and get soft close because we both pinched our fingers within seconds and the loud SLAM it made when it closed wasn’t going to fly.
We added magnets to the inside so the front would be sure to close flush and it made all the difference!

Here’s how it looks from the side when it’s open.

This is what it looks like when it’s open all the way.

We put on the end piece and I chiseled away at it some more to make it look cohesive.

STAINING THE MANTLE
When it came to figuring out the wood color I tried a few different things.
I tried a test piece and put the stain right on the wood and really didn’t like the yellow color coming through the wood.
I had read that white washing the wood first would take out the yellow so I tried that and then put the stain on top and my wood had a purplish hue to it which I really hated haha
ONLY STAIN ON LEFT WHITE WASH WITH STAIN ON RIGHT


Then I started thinking….old wood looks the way it does because it’s been outside right? Well let’s use outside! I grabbed some dirt from my yard, added water and here’s what happened!
I added just dirt to the top half and on the bottom half I did dirt and then stain on top and I LOVE the coloring! Much warmer and the dark stain brings out all the flaws in the wood.
Here’s how it looks after staining and it really did turn out so close to my vision!


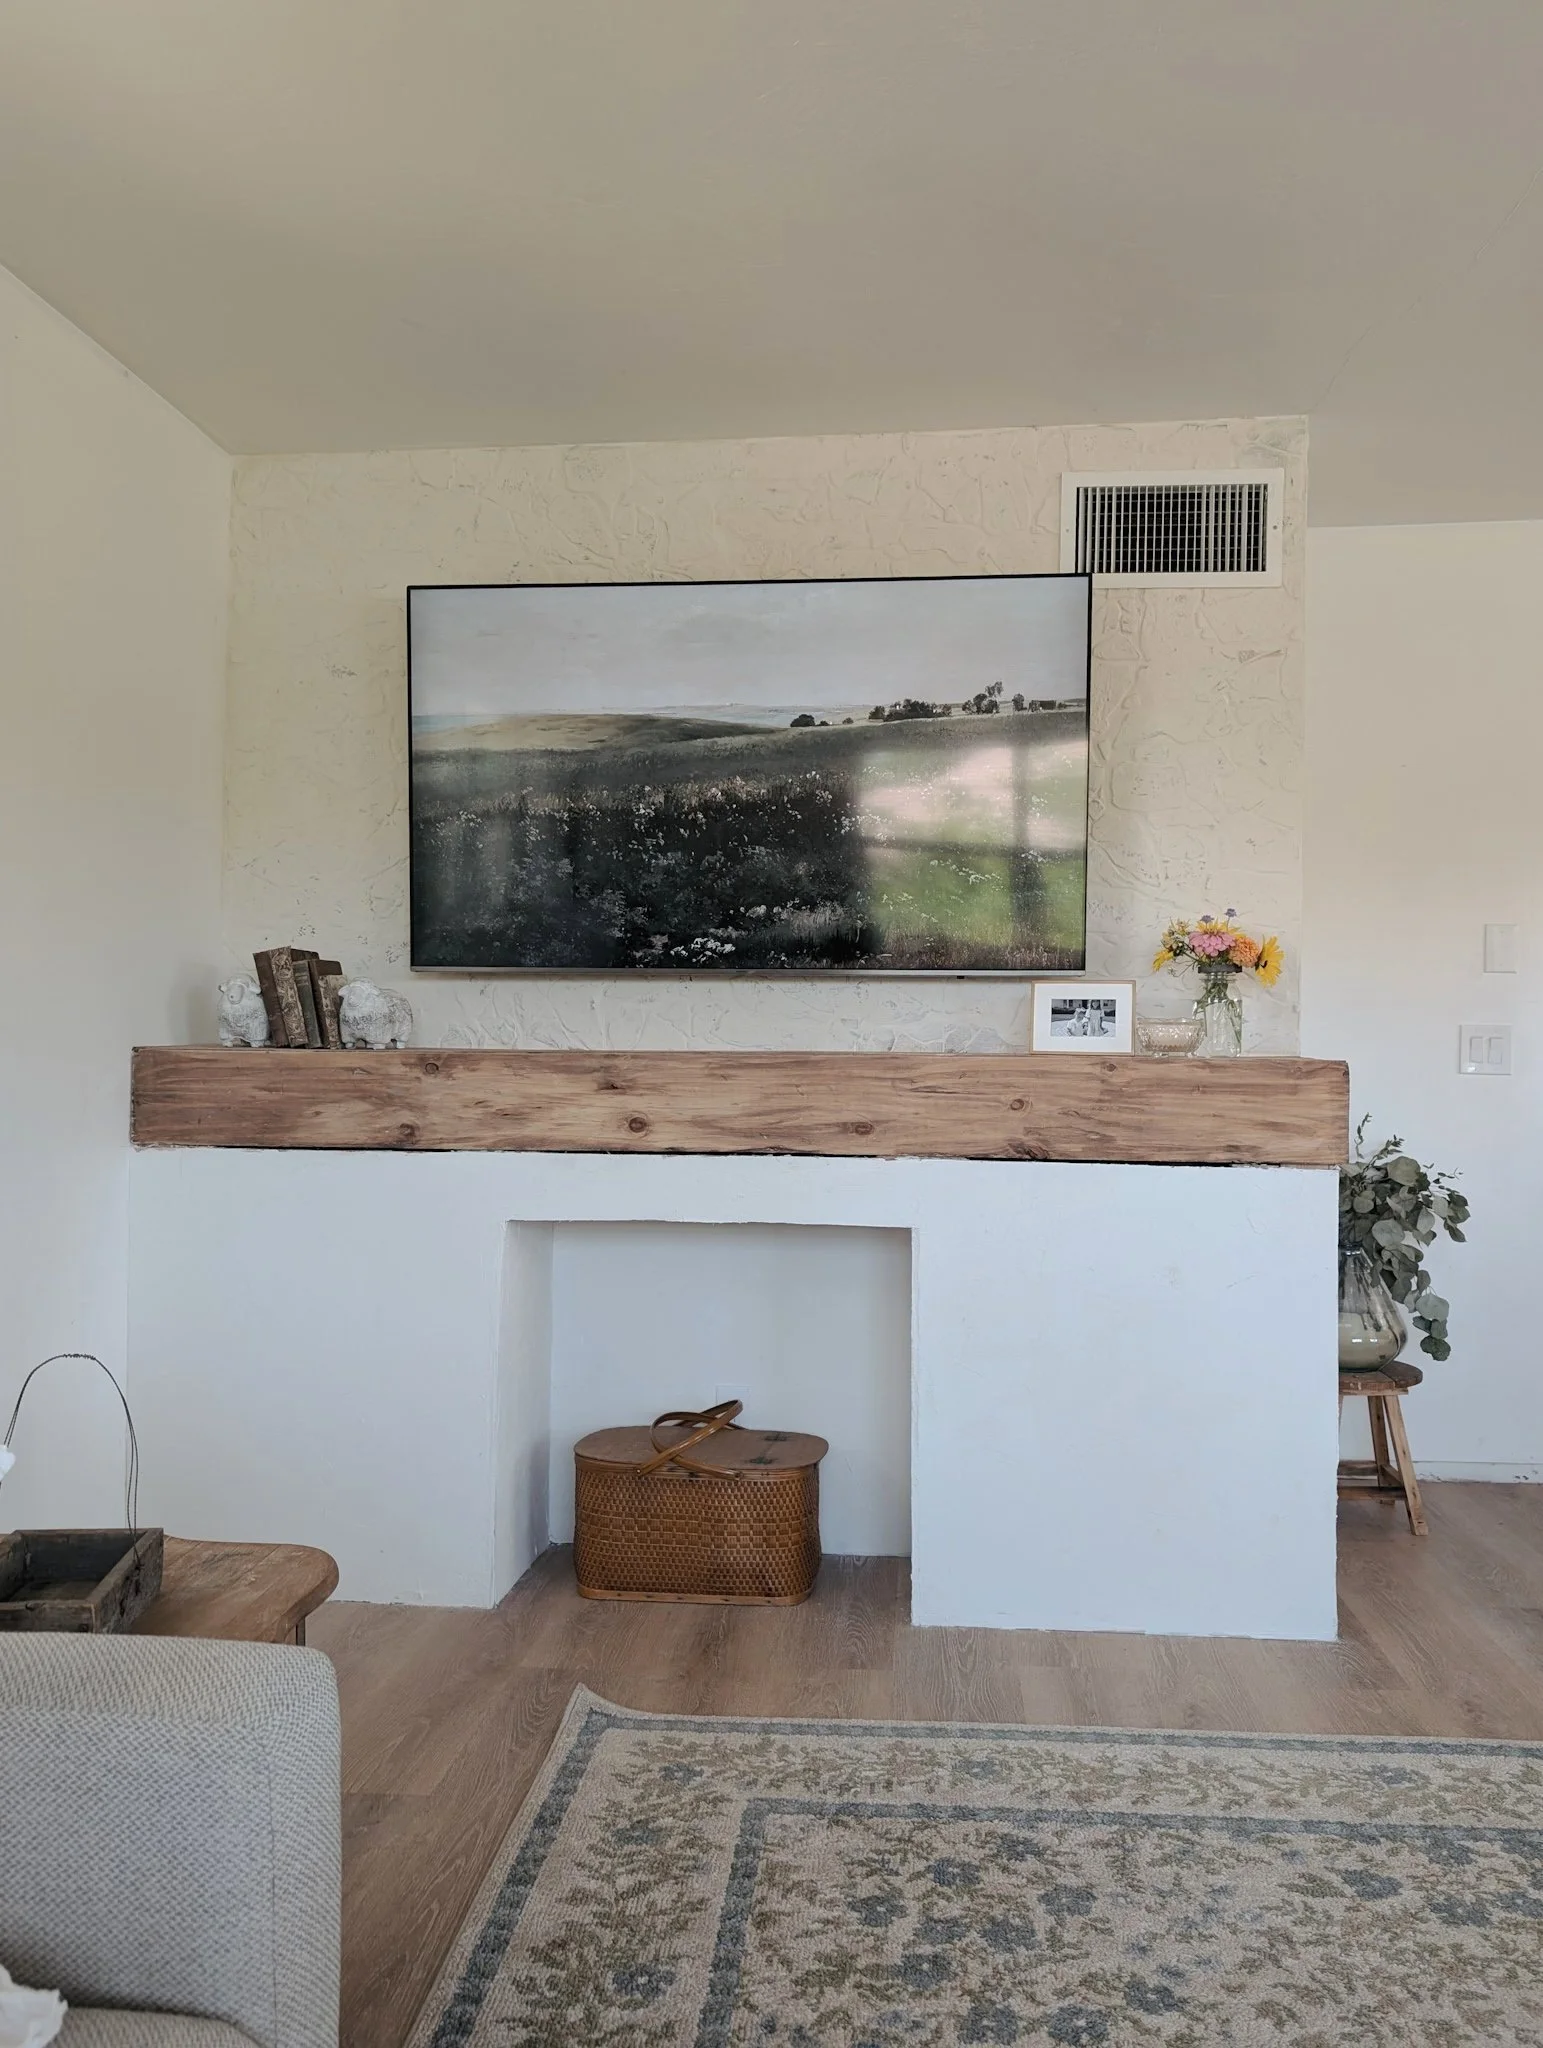
Now all we need is our fireplace and to make our own delft tiles! Stay tuned for final details in PART TWO!
As always thanks so much for reading!
xoxo,

LATEST PROJECTS


